Skip to content
The Journal

Stories, guides, and hard-won lessons from the garage

Every article here is written by an enthusiast who has done the work. Open any story to read it in full, right on this page.

  • Automotive History
  • Restoration
  • Buying Guide
  • Road Trips
  • Garage Life
  • Mechanical
  • Collecting
  • Craft
  • Community
  • Maintenance
  • Stories
Burgundy 1969 American muscle car with chrome trim displayed in a collector showroom
Automotive History

The Golden Era of American Cars

By Walt Brennan · 9 min read · April 18, 2026

From the chrome-laden cruisers of the 1950s to the fire-breathing muscle cars of 1969, the postwar decades gave America a design language we still chase in our garages today.

Read the full article

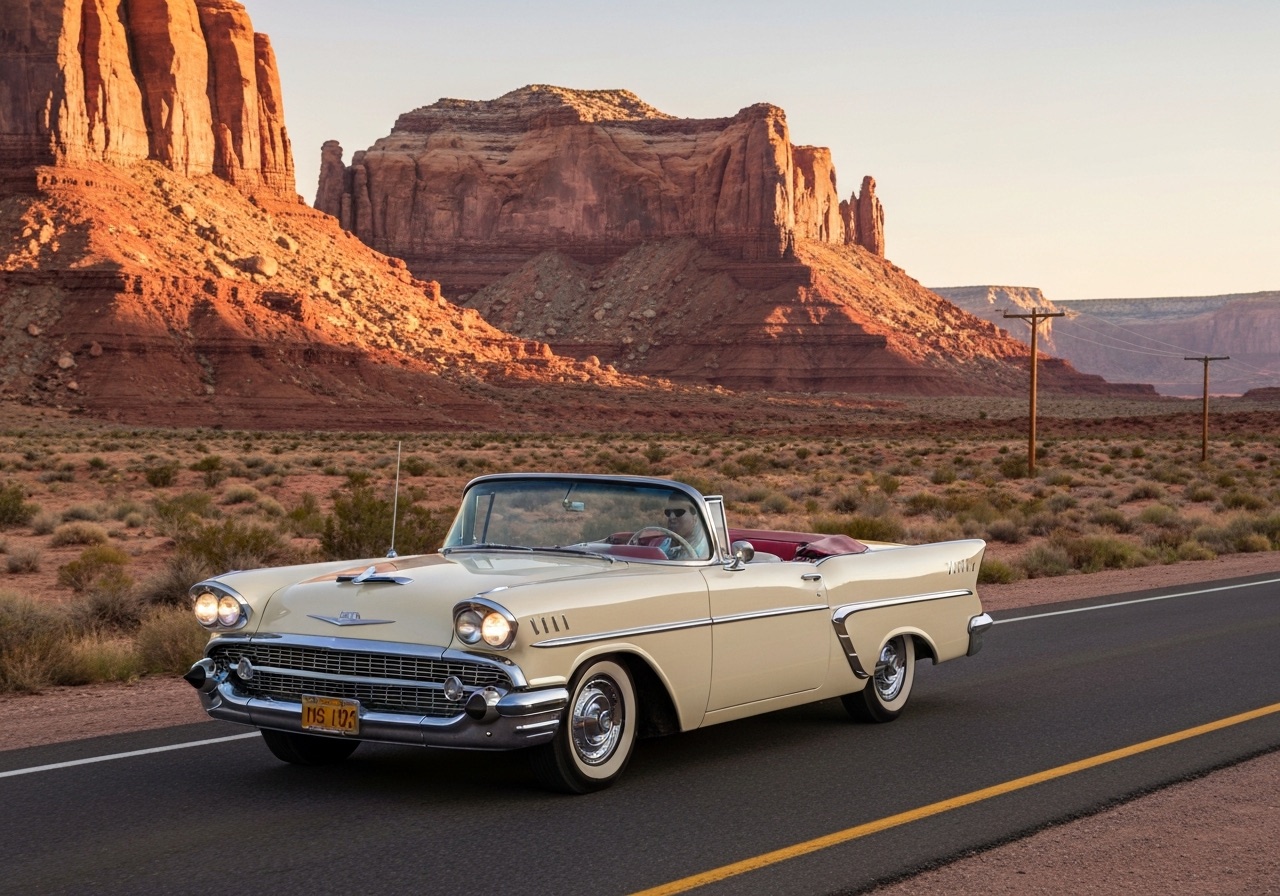
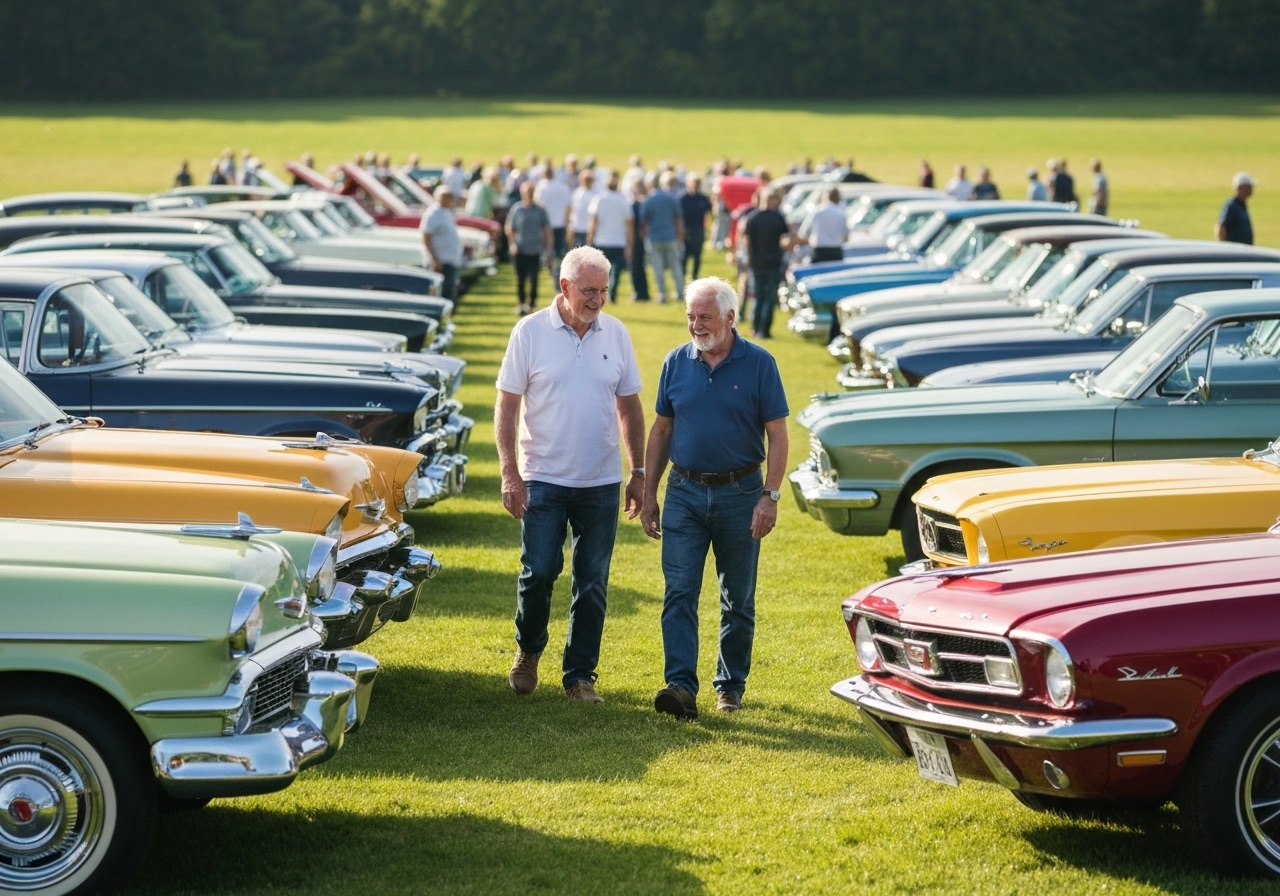
There is a reason a retired machinist and a retired schoolteacher will stop on the same sidewalk to stare at a 1957 Bel Air. The two decades that followed the Second World War produced cars that were unapologetically expressive. Steel was cheap, optimism was cheaper, and Detroit poured both into tailfins, jet-age dashboards, and grilles that grinned like a Saturday night.

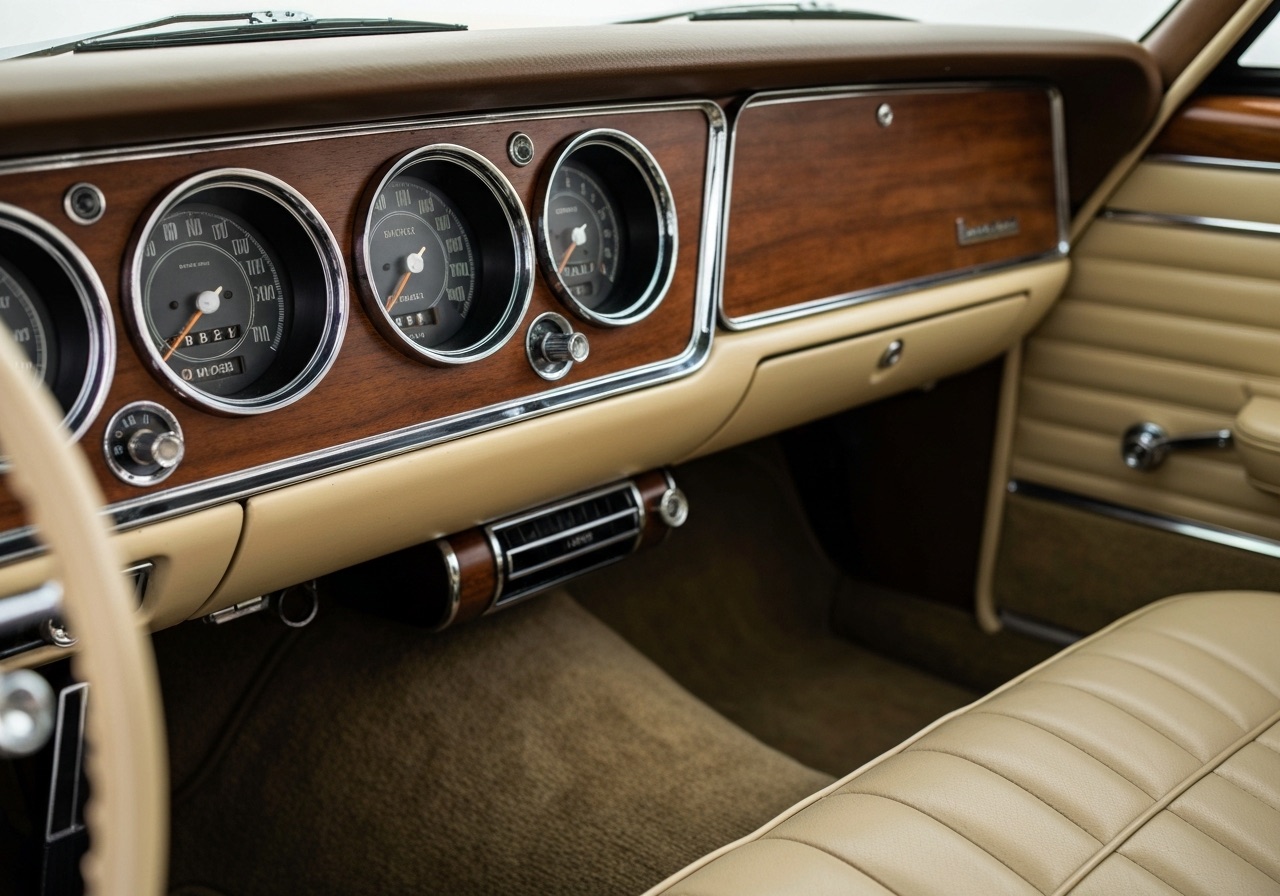
The 1950s were about presentation. Harley Earl, the first head of styling at General Motors, treated the automobile as sculpture you could drive. Two-tone paint, wraparound windshields, and chrome by the pound turned a commute into a parade. The cars were heavy, soft, and gloriously confident.

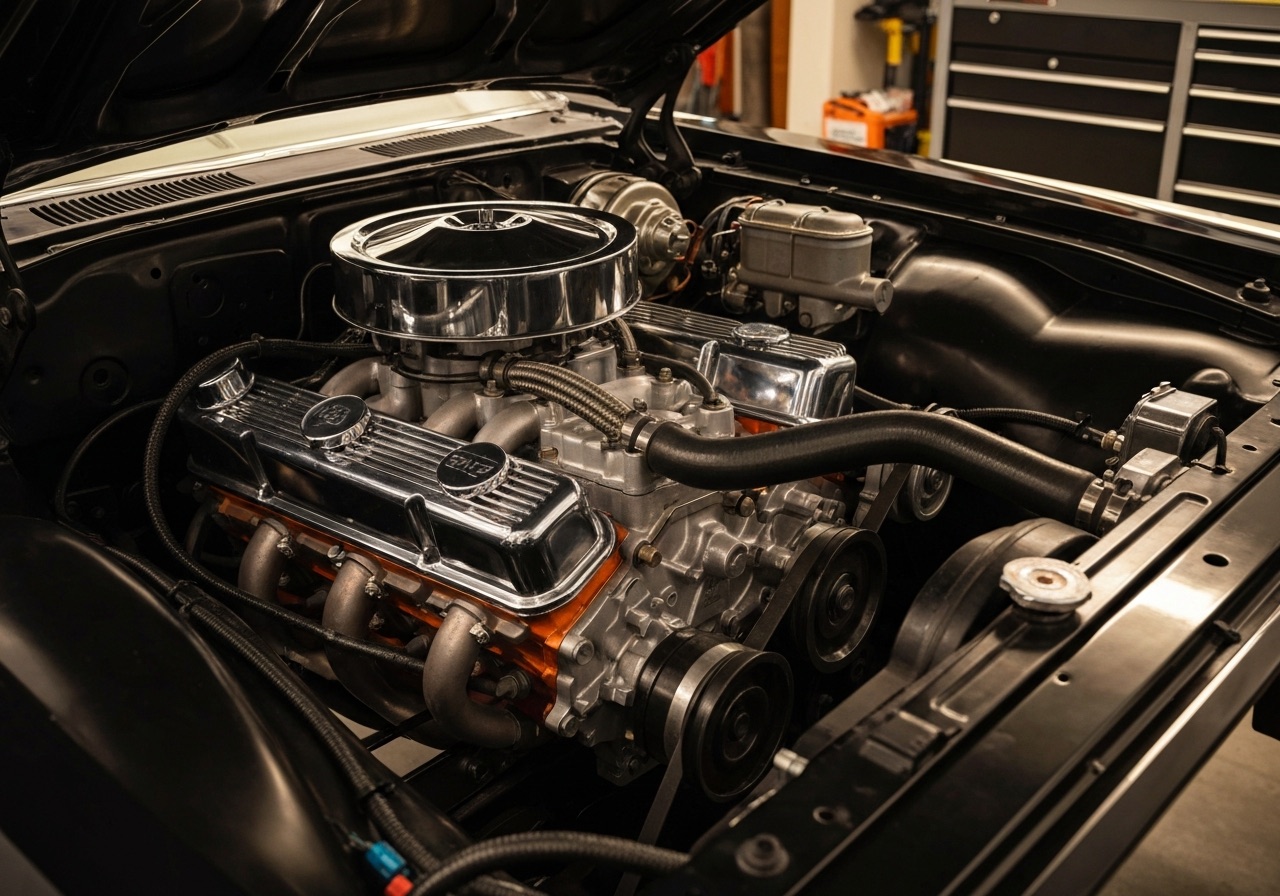
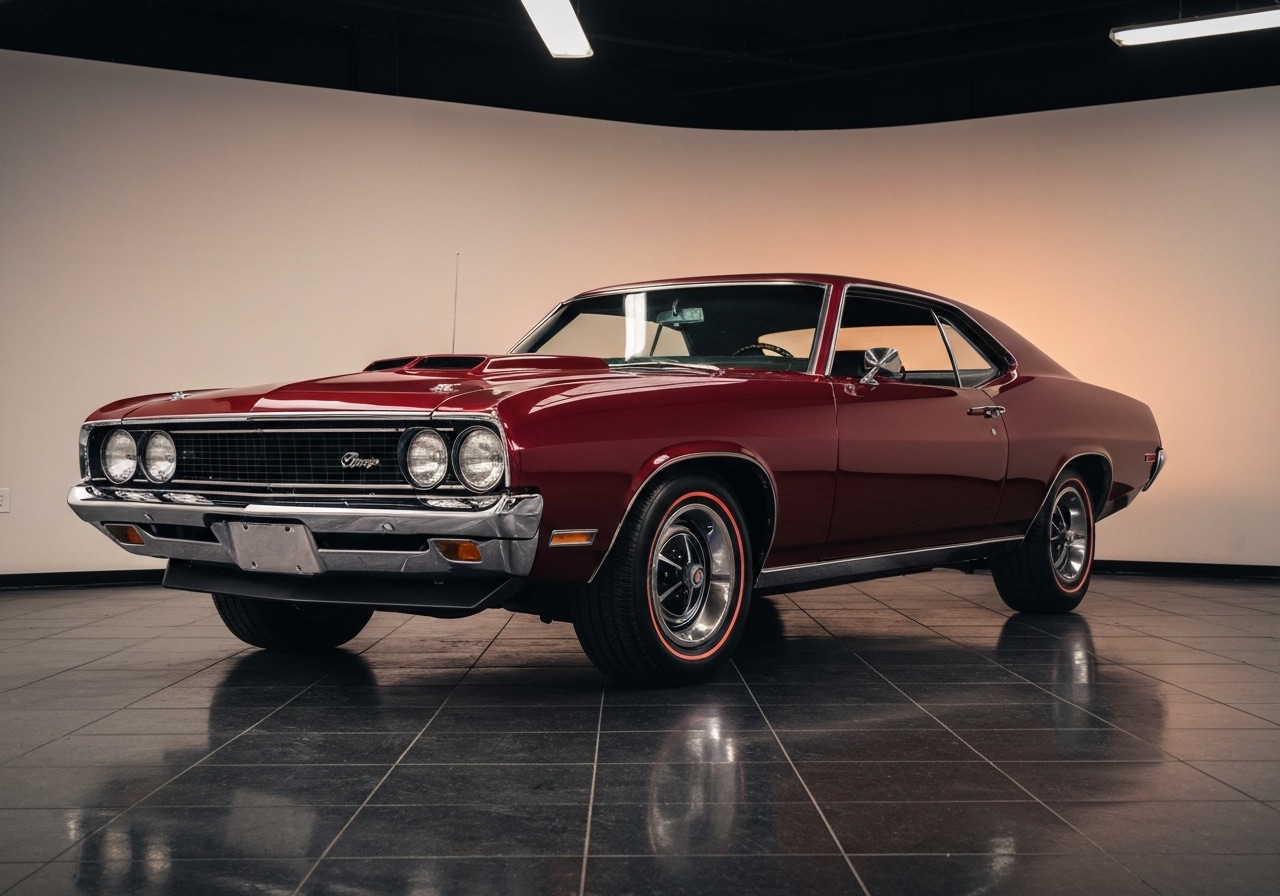
By the mid-1960s the conversation changed from how a car looked standing still to how it felt pinned to a vinyl bench seat. The muscle car era began the day someone dropped a big engine into an intermediate body and discovered that affordable speed sells. The 1964 GTO is usually credited as the spark, and within five years nearly every division had an answer.

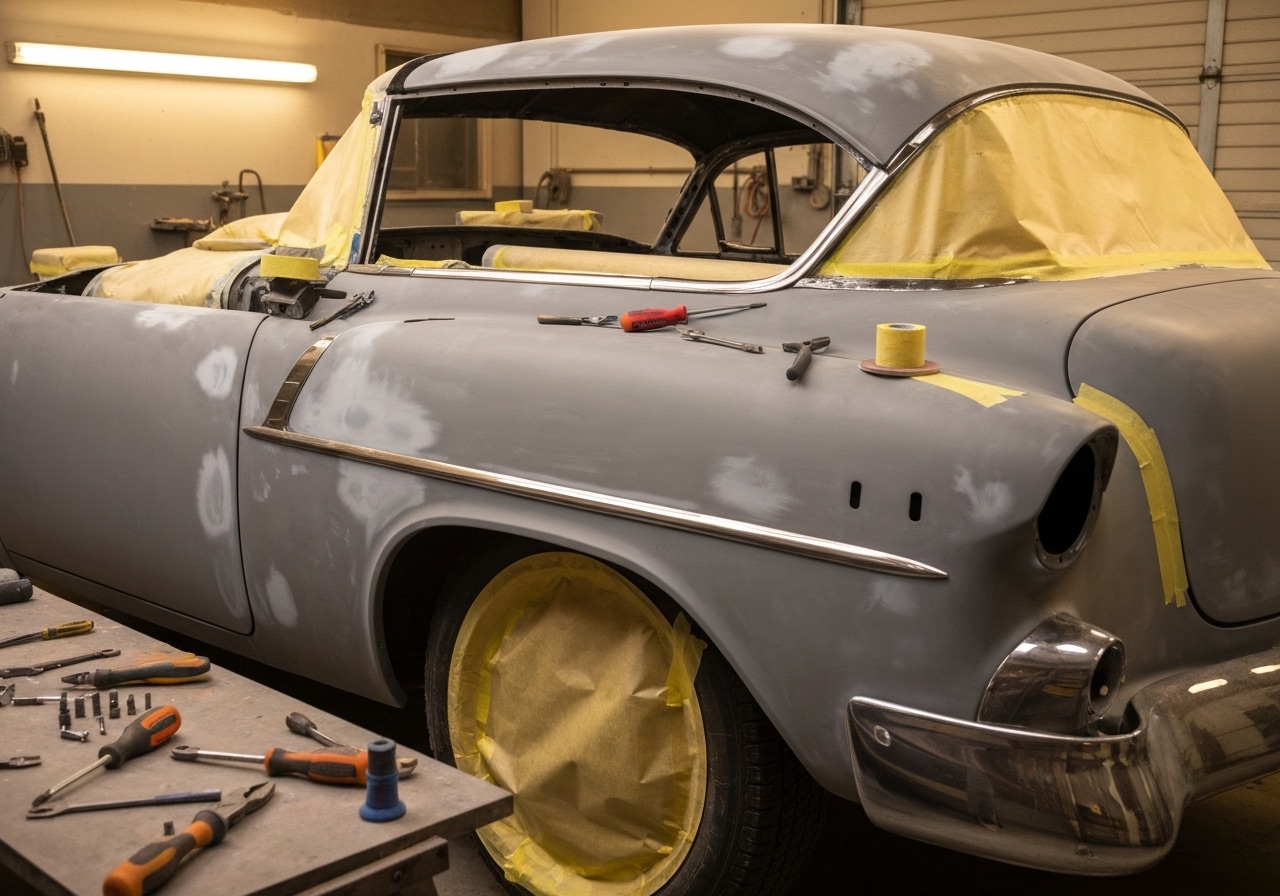
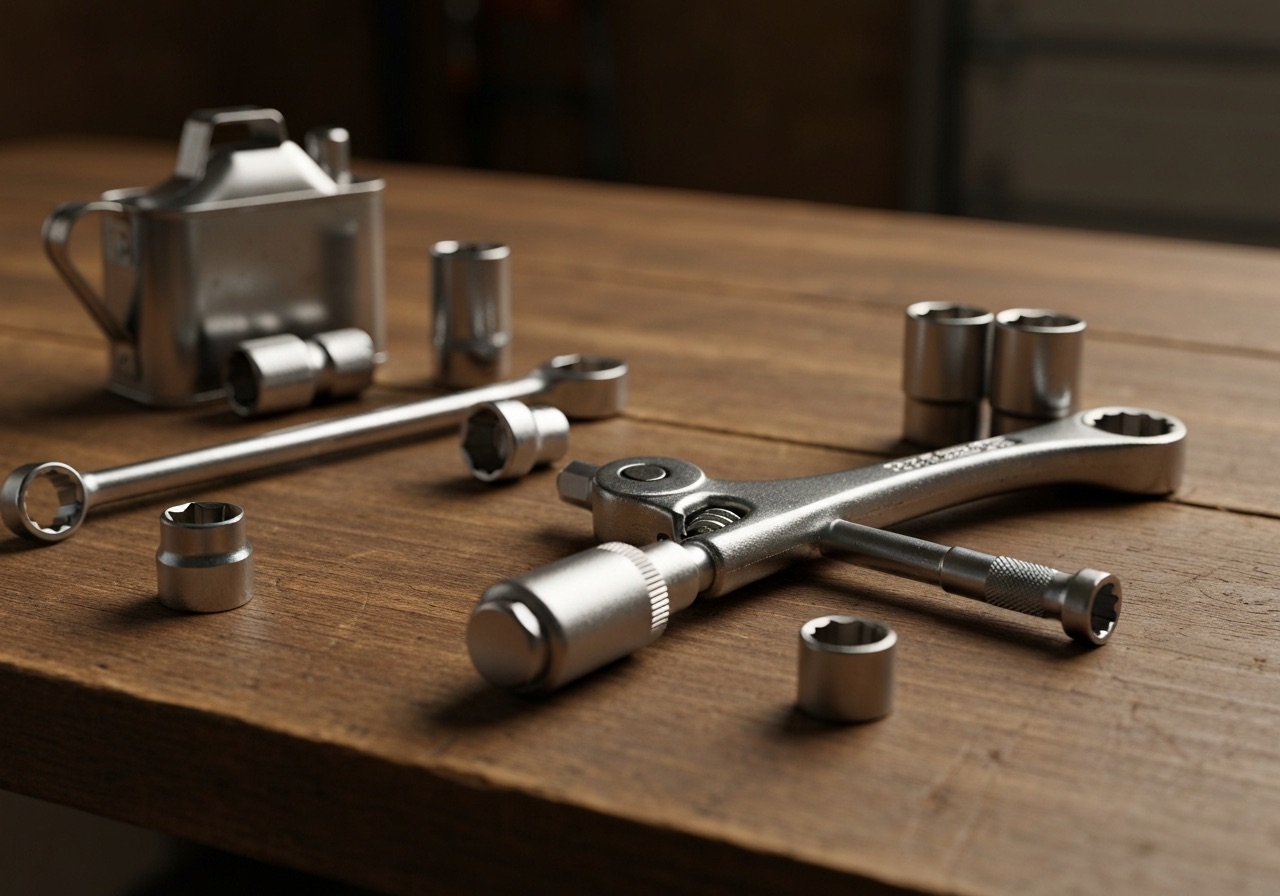
For the enthusiasts we write for, this era matters because the cars are knowable. A points ignition, a carburetor, a body-on-frame layout — these are systems a patient person can learn, diagnose, and rebuild on a weekend. That accessibility is exactly why the golden era remains the heart of the restoration hobby, and why a well-kept example still draws a crowd at any show.

Classic American car mid-restoration, body in grey primer with one polished chrome fender
Restoration

How to Start a Restoration Project Without Losing Your Shirt

By Dale Whitman · 11 min read · April 10, 2026

The most expensive restoration is the one you start twice. A clear plan, an honest budget, and a hard look at rust will save you more money than any tool you can buy.

Read the full article

Every restoration begins the same way: with a car that seems like a bargain. The trouble is that purchase price is the smallest number you will ever write down. Before you fall for a project, decide what you actually want at the end. A faithful factory-correct restoration, a clean weekend driver, and a personalized restomod are three different budgets and three different timelines.

Buy the best example you can afford. A solid, complete car at a higher price is almost always cheaper than a cheap shell that needs everything. Rust is the silent budget killer. Bring a magnet and a flashlight, and inspect the floor pans, trunk floor, lower fenders, and frame rails. Bubbling paint and fresh undercoating are warnings, not features.

Write a real budget with three columns: parts, services you will outsource, and a contingency of at least twenty percent. Media blasting, machine shop work, upholstery, and final paint are the line items that surprise first-timers. If you plan to farm out paint and interior, get quotes before you buy, not after.

Photograph everything before you take it apart. Bag and label hardware by assembly. A disciplined teardown is the difference between a six-month project and a three-year garage ornament. Order a factory service manual and an assembly manual for your specific year and model — they are the cheapest insurance you will ever buy.

Finally, set a realistic cadence. Most successful home restorations move in defined phases: rolling chassis, then drivetrain, then bodywork and paint, then interior, then final assembly and tuning. Finish one phase before opening the next, and you will keep both your momentum and your marriage intact.

Fully restored burgundy classic American muscle car with chrome trim on a polished showroom floor
Buying Guide

Best Classic Cars for Retirees

By Walt Brennan · 8 min read · April 2, 2026

The ideal first classic for a retiree is forgiving to drive, easy to find parts for, and comfortable enough to actually enjoy on a Sunday. Here is where to look.

Read the full article

When you have the time to enjoy a classic, the smart move is to choose one that rewards driving rather than constant wrenching. Three qualities matter most after retirement: parts availability, mechanical simplicity, and genuine comfort behind the wheel.

The 1964–1973 Ford Mustang is the default recommendation for good reason. Parts are everywhere, the aftermarket is enormous, prices span every budget, and a six-cylinder coupe with an automatic is an honest, drama-free cruiser. The 1966–1977 Ford Bronco and the 1967–1972 Chevrolet C10 pickup offer the same supportive parts network with a more rugged character.

If you want comfort over a curve, the full-size cruisers of the era — a Chevrolet Impala, an Oldsmobile 88, or a Mercury Marquis — float down the highway with air conditioning that, once rebuilt, actually works. These cars are undervalued precisely because they are large, which makes them a relative bargain.

For something sportier without temperament, the early Mazda MX-5 Miata has quietly become a modern classic that retirees love: cheap, utterly reliable, and small enough to be a joy. Whatever you choose, prioritize a documented, sorted car over a cheaper project, and take a long test drive before you commit.

Cream vintage 1957 convertible driving an empty Route 66 desert highway at sunset
Road Trips

Planning the Ultimate Route 66 Trip

By Marie Calloway · 12 min read · March 26, 2026

Two weeks, eight states, and 2,448 miles of the Mother Road. A realistic itinerary for driving Route 66 in a classic car — including how to prepare the car so it arrives with you.

Read the full article

Route 66 ran from Chicago to Santa Monica, and while the interstate replaced most of it, hundreds of miles of original alignment still wait for anyone willing to leave the freeway. Driving it in a classic is the trip of a lifetime, but it rewards preparation far more than spontaneity.

Start with the car. A pre-trip inspection should cover cooling system, brakes, fresh fluids, belts and hoses, tires with date codes under six years old, and a charging system you trust. Pack a basic spares kit: points and condenser if applicable, a spare belt, fuses, a quart of oil, hose clamps, and tools you actually know how to use.

Plan roughly 200 to 250 miles a day. That sounds short until you factor in vintage gas stations worth photographing, diners worth a slow lunch, and the simple fact that classics are happier cruising than hammering. A realistic two-week itinerary moves Chicago to St. Louis, across Missouri to Oklahoma, through the Texas panhandle to Tucumcari, into New Mexico and Arizona, and finally to the pier at Santa Monica.

Do not miss the highlights: the Gemini Giant in Illinois, the Chain of Rocks Bridge, the blue whale of Catoosa, Cadillac Ranch outside Amarillo, the painted desert near Holbrook, and the long climb through the Black Mountains to Oatman. Book lodging in the small towns a day or two ahead in summer; the good motor courts fill fast.

Finally, keep a logbook. Note fuel stops, mileage, and anything the car tells you. Half the joy of the Mother Road is the story you bring home, and a classic that crossed the country is a different machine when it rolls back into your garage.

Interior of a vintage 1950s automotive garage with pegboard tools and a rolling tool chest
Garage Life

Garage Organization Tips That Actually Stick

By Dale Whitman · 7 min read · March 19, 2026

A working garage is organized around how you actually move while you wrench. Zones, light, and a place for every tool turn frustration into flow.

Read the full article

A great garage is not the one with the most tools; it is the one where you can find the right tool without breaking your rhythm. Start by dividing the space into zones: a clean assembly bench, a dirty teardown area, a parts-storage wall, and a clear path around the car.

Light is the upgrade everyone underestimates. Flicker-free LED shop lights overhead plus a movable task light will reveal the rust, the leak, and the dropped 10mm socket you would otherwise miss. Good light also makes the space somewhere you want to be on a winter evening.

Store fasteners in labeled bins and keep a parts-washer or a simple solvent tray near the teardown zone. A magnetic strip for wrenches, a shadow board for sockets, and a rolling chest for the tools you reach for daily will pay for themselves in saved minutes every session.

Protect the floor and your back. An epoxy floor cleans up in seconds and brightens the whole room. A pair of anti-fatigue mats and a quality creeper save your knees and spine over a long restoration. Organize once, maintain weekly, and the garage stays a workshop instead of becoming a storage unit.

Fully restored polished chrome V8 engine inside the engine bay of a classic American car
Mechanical

Engine Restoration Basics for the Home Builder

By Hank Mercer · 13 min read · March 11, 2026

Rebuilding a classic V8 is within reach of a careful hobbyist. Understand the machine shop relationship, the measurements that matter, and the assembly discipline that makes it last.

Read the full article

A from-the-ground engine rebuild is one of the most satisfying milestones in any restoration, and on the simple overhead-valve V8s of the era it is genuinely achievable at home. The secret is knowing which jobs to do yourself and which to hand to a trusted machine shop.

Teardown is your inspection. As you disassemble, look for scoring on cylinder walls, ridge at the top of the bore, worn cam lobes, and play in the bearings. Keep every part organized and labeled. The block, crankshaft, and heads then go to the machine shop for the work that requires precision equipment: hot-tanking, boring and honing, decking, valve jobs, and crankshaft grinding.

Measurement is everything. A dial bore gauge, a micrometer, and a set of plastigage strips let you verify bearing clearances, ring end gap, and piston-to-wall clearance against the factory specifications. Assembling an engine on assumptions rather than numbers is how rebuilds fail in the first thousand miles.

Cleanliness during assembly is non-negotiable. Lubricate every bearing with assembly lube, torque every fastener to spec in the correct sequence, and degree the camshaft if you want the engine to make the power the cam grind promises. Prime the oil system before the first start, and follow a proper break-in procedure for a flat-tappet cam.

Take your time on the details — a new timing set, freeze plugs, gaskets, and a fresh water pump and oil pump are cheap insurance while everything is apart. Done patiently, a home rebuild will outlast the person who built it.

Burgundy 1969 American muscle car with chrome trim displayed in a collector showroom
Collecting

Understanding Vintage Car Values

By Marie Calloway · 9 min read · March 4, 2026

Condition, originality, documentation, and rarity drive what a classic is worth — and the auction headlines rarely reflect what your car will actually sell for.

Read the full article

Classic car values confuse newcomers because the headline auction numbers describe a tiny slice of the market: the very best examples of the most desirable models. The car in your garage lives in a much larger, more rational market, and understanding the levers of value protects you whether you are buying, insuring, or selling.

Condition is king, and the hobby uses a 1-to-6 scale, from a concours number 1 to a parts-only number 6. The gap between a number 2 driver-quality car and a number 3 average car can be enormous, because the cost to move a car up the scale is high. Originality matters too: numbers-matching drivetrains, original paint codes, and factory options command premiums.

Documentation turns a story into value. A build sheet, window sticker, original title, service records, and a photographic restoration history all reduce a buyer’s risk and raise the price. Rarity multiplies everything, but only when paired with desirability — a rare trim of an unloved model is still unloved.

Use multiple sources to triangulate a real number: recent comparable sales, a recognized valuation guide, and the asking prices of similar cars currently for sale. Insure your car on an agreed-value policy, not actual cash value, so a claim reflects what you have actually built.

Vintage classic car dashboard with round chrome-rimmed analog gauges and a cream Bakelite panel
Craft

Classic Car Photography Tips

By Marie Calloway · 8 min read · February 24, 2026

Great car photos are mostly about light and reflection, not gear. Learn to read the surface of the paint and your phone will outshoot most DSLRs.

Read the full article

A classic car is a giant curved mirror, which is exactly why so many snapshots disappoint. Master reflections and you master car photography, whether you shoot on a phone or a full-frame camera.

Light first. The hour after sunrise and the hour before sunset wrap a car in warm, soft light and tame the harsh reflections of midday sun. Overcast days are a gift: the cloud cover becomes a giant softbox that lets the paint and chrome glow without hot spots.

Watch what the paint reflects. Move yourself and the car until the bodywork mirrors clean shapes — trees, sky, an open field — instead of cluttered buildings or your own silhouette. Shoot the three-quarter front, get low to make the car look planted, and use a longer focal length to keep the proportions honest.

Tell the whole story with detail shots: the badge, the gauge cluster, the stitching, the wheel. Clean the glass and chrome before you shoot, kill distracting backgrounds, and resist heavy filters. A faithful image of a beautiful car needs very little help.

Two retired enthusiasts walking a row of polished vintage cars at an outdoor classic car show
Community

How Retired Enthusiasts Build Car Communities

By Walt Brennan · 7 min read · February 17, 2026

The cars get us in the door, but the people are why we stay. Here is how retirees across the country are turning a solitary hobby into a weekly highlight.

Read the full article

Restoration can be a solitary pursuit, and for many of us that quiet is part of the appeal. But the enthusiasts who get the most from the hobby almost always belong to a community, and building one in retirement is easier than it looks.

Start where the cars already gather. A weekly cars-and-coffee meet, a regional marque club, or a local cruise night gives you an instant circle of people who speak your language. Show up three or four times before you decide whether it fits; communities reveal themselves slowly.

Generosity is the currency that builds belonging. Lend a hand on someone’s stubborn carburetor, share the name of an honest machine shop, or simply hold the trouble light for an hour. The person you help today becomes the friend who tows you home next year.

When you are ready, host something small: a tech day in your garage, a Sunday drive to a diner, or a parts swap on a folding table. The road trips, the friendships, and the stories that follow are, for most of our readers, the real reward of the hobby.

Interior of a vintage 1950s automotive garage with pegboard tools and a rolling tool chest
Maintenance

Protecting and Storing Collector Vehicles

By Hank Mercer · 10 min read · February 9, 2026

A classic that sits is a classic that quietly deteriorates. The right storage routine keeps fuel fresh, rubber supple, and rodents out so spring starts on the first crank.

Read the full article

Most damage to a collector car happens while it is parked, not while it is driven. A deliberate storage routine — for winter or for any long layup — keeps a classic ready to enjoy rather than ready to repair.

Manage moisture first, because moisture is rust. Store the car in a dry, ventilated space, ideally off a bare concrete floor that wicks humidity. A car cover designed to breathe is better than a plastic tarp that traps condensation, and a small dehumidifier earns its keep in a damp garage.

Prepare the fluids and fuel. Change the oil before a long layup so acids do not sit in the crankcase, fill the tank and add a quality fuel stabilizer to limit condensation and ethanol trouble, and make sure the coolant is mixed correctly to prevent freezing. Maintain the battery on a quality trickle charger or tender.

Save the tires and keep the critters out. Inflate tires slightly above normal to resist flat spots, or place the car on jack stands for very long storage. Steel wool in the exhaust tips and air intake, plus a few traps, will discourage the mice that love a quiet engine bay. Finally, drive the car when you can — gentle, regular use is the best preservative of all.

Vintage chrome wrenches, sockets and an oil can laid out on a worn wooden workbench
Restoration

Bringing Chrome and Trim Back to Life

By Dale Whitman · 8 min read · January 30, 2026

Pitted bumpers and dull stainless can make a good car look tired. Knowing what to polish, what to replate, and what to replace keeps the brightwork honest and the budget sane.

Read the full article

Brightwork is what catches the eye across a show field, and on the cars of the golden era there is a lot of it. The trick is sorting trim into three buckets: polish, repair, or replate, because the wrong choice wastes money fast.

Stainless and aluminum trim can usually be saved at home. Light scratches and dents in stainless can be worked out with careful sanding and progressive polishing, finishing with a buffing wheel and the right compounds. Anodized aluminum is more delicate and should be polished gently to avoid cutting through the finish.

Chrome is a different animal. True triple-plated chrome over steel cannot be restored with polish once it pits — it must be stripped and replated by a specialist. Quality replating is expensive, so prioritize the parts that define the car’s face: the front bumper, grille, and headlight bezels.

Protect what you restore. A coat of quality wax or a dedicated metal sealant on fresh chrome, and regular cleaning of stainless, will keep the brightwork bright for years. Reproduction trim is available for popular models when an original is beyond saving, but always compare fit and finish before you commit.

Turquoise 1955 classic car parked at a restored Route 66 gas station with retro fuel pumps
Stories

First Cars and Found Memories

By Marie Calloway · 6 min read · January 22, 2026

Why do so many of us restore the exact car we drove at eighteen? A reflection on nostalgia, identity, and the quiet reasons we chase the cars of our youth.

Read the full article

Ask a hundred enthusiasts why they chose their project and a surprising number will name the car they owned, or wished they owned, when they were young. The hobby is rarely only about the machine. It is about the version of ourselves who drove it.

Restoring a first car is a way of keeping faith with that younger person — the one who saved for months, learned to change oil in a driveway, and felt the whole world open up the first time they pulled out of it alone. The car becomes a time machine that runs on gasoline and memory.

There is craft in this, too. When you rebuild the carburetor your father once cleaned at the kitchen table, you are not just restoring a part; you are restoring a conversation. Many of our readers tell us the garage became the place where they finally understood a parent, a sibling, or simply themselves.

So if the car you want makes no financial sense, build it anyway. The most valuable classics are not the ones that top the auctions. They are the ones that bring a memory back to life every time the engine turns over.